Managing your e-mail accounts
Introduction
While at
- Message access protocols, what they mean
and how to use them
- Connecting to multiple
mailboxes simultaneously using Microsoft Outlook, including non-academic mail
clients such as Hotmail
- Customizing your Outlook
- Creating mailing lists and mailing rules
Message
Access Protocols
POP3
POP3
is a common protocol that is used to retrieve e-mail messages from an Internet
e-mail server. If you check your POP3 e-mail account from
different computers using the default Microsoft Outlook POP3 settings, the
computer that downloads a new e-mail message is the only location where the
message is stored. The message would no longer be on the POP3 e-mail server
when you connect from another computer. This
allows for a centralized storage of e-mail messages on the client computer,
which frees up space on the mail server and in general speeds up access to the
messages.
You can choose to download a copy of new
e-mail messages and not delete items from the POP3 e-mail server. This can be
useful if you check your POP3 e-mail account from multiple profiles or
computers. For example, you can download a copy of the messages on your work
computer, and then on your home computer, you could download the e-mail
messages and delete them from the POP3 server.
IMAP
Internet Message Access
Protocol (IMAP): Unlike Internet e-mail
protocols such as POP3, IMAP creates folders on a server to store/organize
messages for retrieval by other computers.
You can read message headers only and select which messages to download. This means your e-mail messages will be
stored centrally and accessible from any computer, provided it is setup to
access the appropriate server. This is a
“slower” protocol but it allows mailbox access from more than once PC.
Setting up you Windows Mail Client
As a graduate student you may, and probably already do, have several
e-mail accounts that you have to check regularly. In addition to the
Setting-up access to you Rice account
To setup your Department
of Statistics Rice account open up Microsoft Outlook, which should be installed
on your XP machine, and go to Tools ® E-mail Accounts.
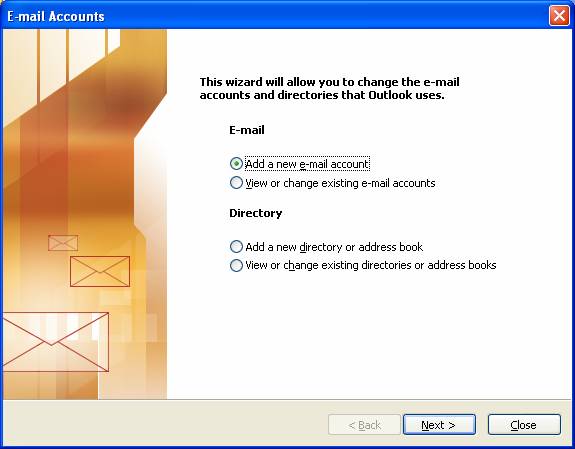
In the window in front of
you choose “Add a new e-mail account” and choose your e-mail access
protocol. Rice supports both POP3 and
IMAP. Once you’ve chosen connection
type, fill in the information to identify your account. Your username and password are the same as
the UNIX e-mail account you should have received earlier. You will need the following information: incoming mail server is stat.stat.rice.edu,
outgoing mail sever is
stat.stat.rice.edu.
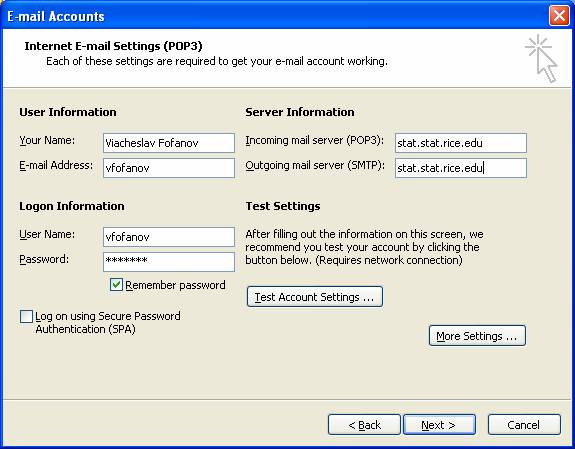
Leave the “Log on using
Secure Password Authentication” box unchecked if it is present. If you are setting up a POP3 account you may
change the default behavior of deleting messages from the server by clicking on
the “More Settings…” button and selecting appropriate option under the
“Advanced” tab.
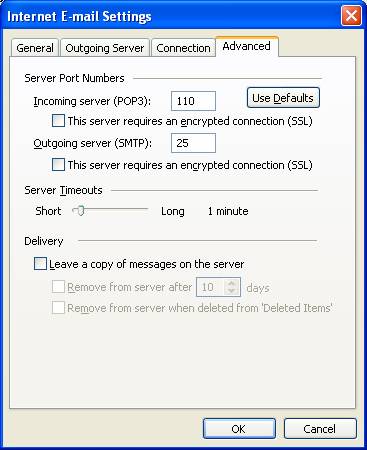
If you want to have a copy
of your email messages on both you home and your Rice machine while still
enjoying the benefits of POP3 access protocol you may want to leave a copy of
the messages on the server so both of the machines have the chance to get at
it.
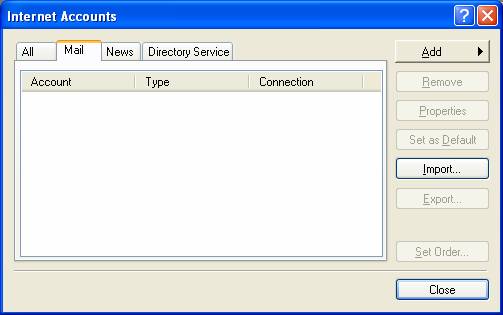
If you are using Outlook Express (a slimmed-down version
of Microsoft Outlook) do the following to setup your account. Open Outlook Express, go to Tools ® Accounts… under the “Mail” tab, click the “Add”
button to add a new mail account.
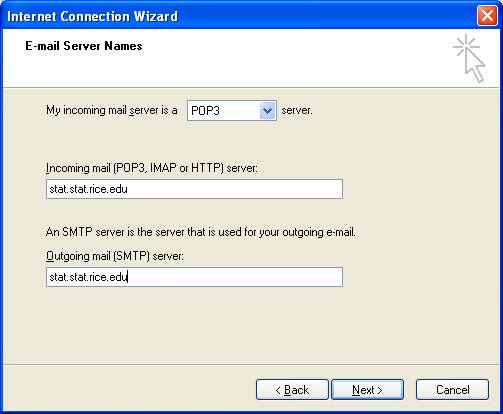
Fill in your name and
email account, choose the desired connection type from a dropdown box in a
window that follows and fill in the incoming and outgoing mail server
information similar to the picture below.
Finally you should be
taken to the following dialog box:
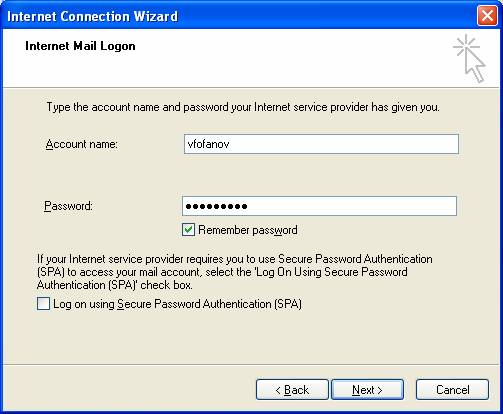
Congratulations you have just
successfully setup your
Setting-up access to additional mailboxes
As I mentioned above, you
may want to access multiple mailboxes.
To do that, follow the steps identical to the setting up of your first
mailbox. Make sure to choose the “HTTP”
option when adding http based mailing clients such as Hotmail or Yahoo.
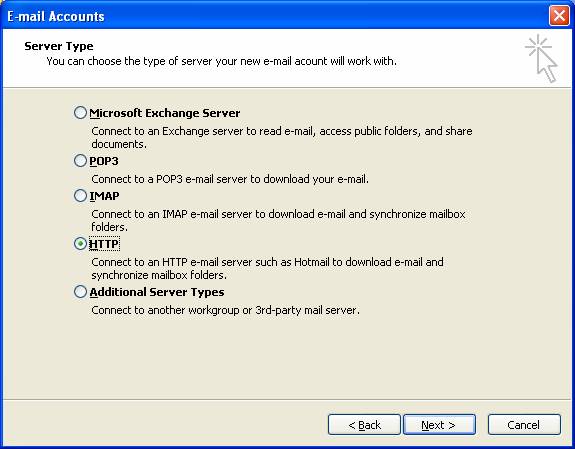
For these you will not
need the incoming and outgoing mail server names, but you will need a URL of
the mailing service (Hotmail and MSN URLs are included and you will not have to
look them up).
Customizing
Microsoft Outlook
Setting up automatic send/receive
intervals
Since you probably don’t want to miss critical e-mails like “Free food in
the coffee room…” or “Help, I can’t figure out how to generate numbers from a
normal distribution!!!” you will want to set up your Microsoft Outlook to
automatically send and receive messages at predefined intervals, similar to the
way UNIX mail clients like pine do it.
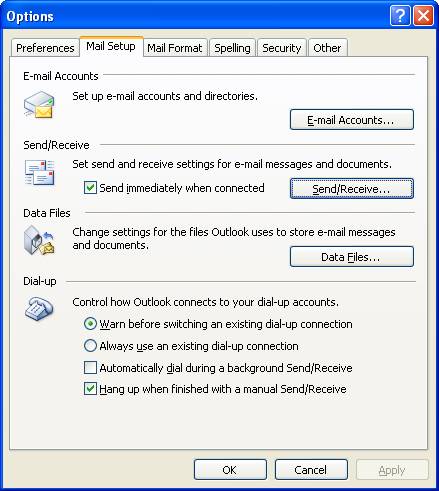
To do this, make sure your Microsoft Outlook is open and go to Tools ® Options…
Under the “Mail Setup” tab click the “Send/Receive” button.
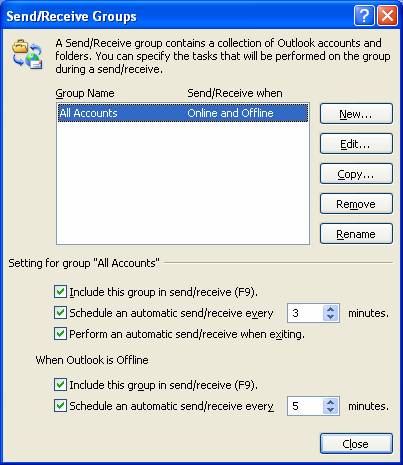
Now choose the interval at which you Mail client will be checking the
server for any additional messages. Foe
example, see my setup below. Note that
since now you know how to setup multiple mailboxes you may specify here
different settings for each of the mail accounts you connect to separately.
Setting up Signatures
One of the nice features
of many e-mail management clients is the ability to add a signature at the end
of each message with helpful contact information or anything else you may want
to include in one. Microsoft Outlook
allows you to have multiple signatures, once for each of the mailing accounts
you are connecting to. For example, if
you are using your Hotmail account for personal correspondence, you may not
want to put the same information in you signature as you would for academic
correspondence associated with your Rice account.
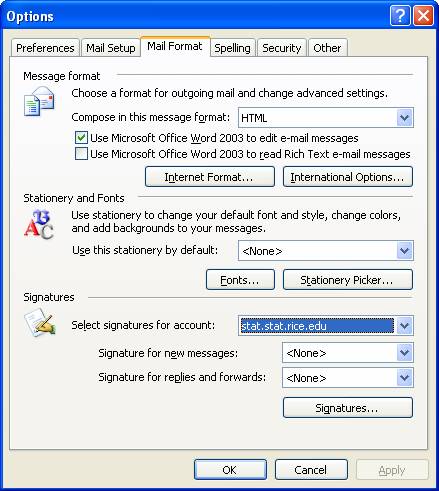
To change or create your
signature, go to Tools ® Options…
Under the Mail Format tab choose the mail account you want this
signature to apply to and press the “Signature” button to go to the dialog box
where you will input it.
Optimizing Outlook
Setting
up mailing lists
Often it is necessary to
e-mail several people at one and if you are doing this multiple times it
becomes very annoying to retype all of the addresses every single time. Not to mention, that if there are many people
on the list you may end up forgetting one or two every once in a while. The easiest way around that is to set up
mailing lists. Some of the mailing lists
are already set up on the UNIX side of things.
One of the more useful ones would be gradstudents@stat.rice.edu which
will email all of the graduate students in the statistics department and faculty@stat.rice.edu which contacts
the entire faculty. Be sure to use these
with great care however, since often you do not need to target such big groups
with your e-mail and receiving bunch of spam can quickly annoy people around
you. So another way is to create your
own mailing lists of students in your year, or may a class you are attending. To do that do the following, once Microsoft Outlook
is open go to Tools ® Address Book…
You should see something like
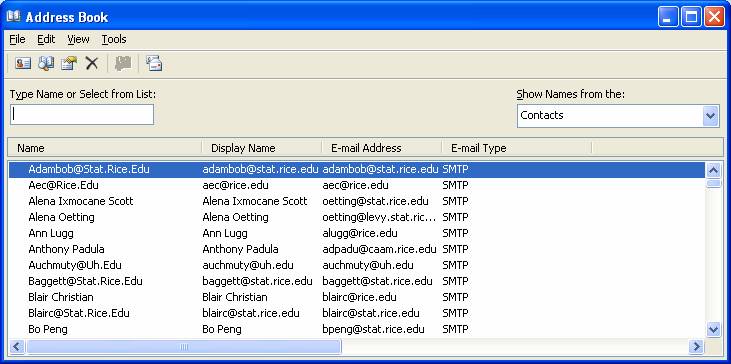
If you just set up your
account you will not see many or any names in the contacts section. Do not worry, Outlook automatically add them
after each of these people send you an e-mail and you reply to them. If you would like to add contacts manually,
without waiting for the person to e-mail you go to File ® New Entry…, while in the Address book screen, and
choose to add a “New contact.”
To set up a mailing list
go to File ® New Entry… and choose “New Distribution List” you
will then be able to name the list and choose who will be on it, either by
selecting their names from a list of contacts (press Select Members… button) or
by adding them in manually by their name and e-mail account (press Add new…
button)
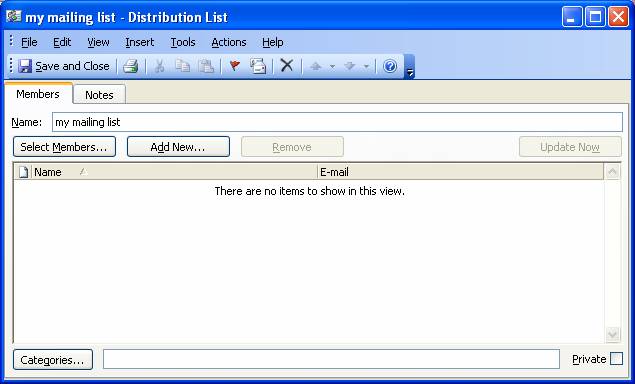
After you have populated
the mailing list with the people you wish to be on it, click “Save and Close”
button. You now will be able to write to
all the people on your mailing list simply by putting the name of the mailing
list into the “To:” section of your e-mail message.
Managing incoming mail (making rules)
Sometimes you may want to
parse the incoming e-mails, for example if you are a TA in a class and you want
all the e-mails from your students (with homework assignments, etc) to be
placed in a separate folder so you can easily find them afterwards. The easiest way to handle that is to set up a
mailing rule that will apply to the incoming messages and place them in the
appropriate folder, while ignoring all of the other messages. This section will show you how to set up a
mailing rule to do this. It is worth
noting that mailing rules are a lot more diverse and powerful than that but you
can figure them out on your own once you are given a start. It also should be noted that any rules that
you make in you Outlook client will not apply to the HTTP based mailing
accounts that you are connected to, such as Hotmail or Yahoo.
To set up a mail rule that
would take all incoming e-mails containing a certain set of words, for example
“STAT280” do the following.
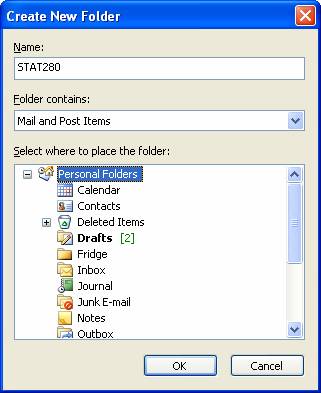
- First you should probably set up a folder to
receive parsed e-mails. Go to File ® Folder ® New Folder and give the name of the folder you wish to
create. In my example the folder’s
name is STAT280 and its located in my Personal Folders.
- Now to create a mail rule go to Tools ® Rules and Alerts… click on a “New Rule…” to
start creating a rule. As you can
see I chose to use one of the templates but you can do the same from
scratch
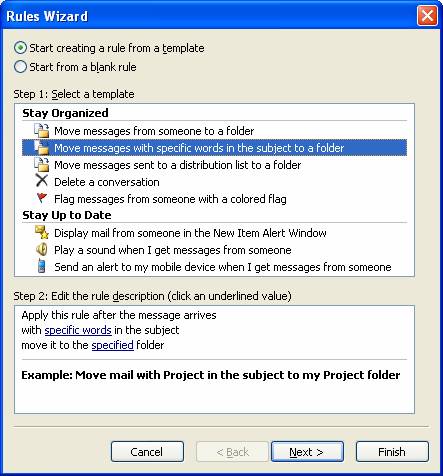
- Click Next.
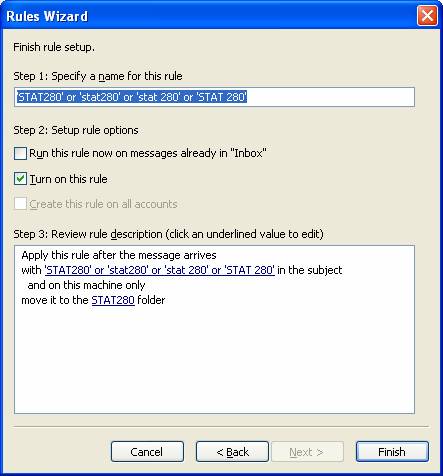
Now all that is left to do is to click on the highlighted words (in
step 2 in the above figure) and input the words that will trigger the rule
(e.g. STAT280) and select the folder where the message will be relocated
to (e.g. STAT280 folder). Note that
the “move” function will remove the original message from the inbox, once
it has been placed in the appropriate folder. This can be changed to copy if you wish
to.
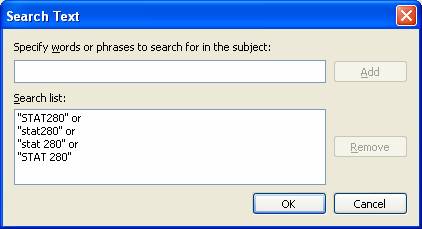
- Make sure to account for all of the strings
that should trigger the rule. If
Outlook does not find the exact
string in the subject line, the rule is not triggered and nothing happens.
- Finally you can choose to run this rule on the
messages already in the folder. It
is a good way to selectively clean out your message folders. Once the rule is turned on, it will
apply to all of the incoming messages until such time you either turn it
off or delete it.