A Simple Guide to Latex/Lyx
stat@rice helpdesk
Run the following commands in a *nix shell (do not enter prompt
> ):
> wget http://www.stat.rice.edu/~helpdesk/howto/lyxdemo.tar.gz
> tar zxf lyxdemo.tar.gz
wget is a useful command to grab something from the web.
Using appropriate command options, it can download the whole web site
(or only files of certain types) recursively. See man wget
for details. tar command is used to uncompress and expand
.tar.gz file. If you are using a windows machine, you can
use a browser to download the file. Something like winRAR has to be
used to uncompress the file.
The demo file lyxdemo.tar.gz contains the following files:
- demoarticle.tex and drawing.eps, demoarticle.ps,
a demo latex file with its output.
- essential.tex, an excellent introduction to latex by Jon
Warbrick.
- latexintro.pdf, The Not So Short Introduction to LATEX2e
by Tobias Oetiker Hubert Partl, Irene Hyna and Elisabeth Schlegl.
- Makefile, a makefile to simplify the use of latex related
commands
- latexsymbol.ps, list of latex symbols
- lyxguide.lyx, this file
- personal.bind and reference.lyx , reference.ps,
helpdesk lyx bind file with its reference
- demo.bib, a sample bibtex file
demoarticle.tex is the latex source file. You are supposed
to input it (in whatever way you like). demoarticle.ps is
one of the several possible outputs. You need to compile the
source code to obtain it. Print and read demoarticle.tex
and demoarticle.ps side by side and try to guess how the
latex commands correspond to the output. It is important for you to
understand
- document class: the document class determines the overall layout of
the document. Changing the document class will change a lot
of your output layout.
- environments (\start{itemize} and \end{itemize}
etc)
- difference between inline ($$) and displayed (\[
\]) formula.
- _, ^ are for subscript and superscript.
- \sqrt, \sin, \alpha,
\beta are math symbols or functions
- \label and \ref. \label
is used to name an equation, section etc so that we can refer to them
by \ref.
- How tables and figures are included.
You should first prepare a .tex file, say article.tex,
then
- latex article.tex, obtain article.dvi
- xdvi artivle.dvi, view the dvi file
- dvips article.dvi, translate dvi to postscript format
- gv article.ps, view ps file
- ps2pdf article.ps, translate ps to pdf format
- acroread article.pdf, view pdf file (xpdf can also
be used.)
- pdflatex article.tex, obtain a pdf file directly from .tex
file
- latex2html article.tex, translate the article to html format.
You can use a make file to simplify all these. (see sample make file
Makefile). The commands will be simlified to make
view, make pdf, make web etc. Note that there are
many options for these commands which makes make especially
useful.
Practice:
- Try to understand every latex command. Use a editor, input the following
formula:
 ..
..
Hint: integral \int, subscript _,
superscript ^,  \xi,
use {} to group items, use \left(
\right) for big parenthesis and () for small
parenthesis.
\xi,
use {} to group items, use \left(
\right) for big parenthesis and () for small
parenthesis.
- Compile and view demoarticle.tex.
- Convert the dvi file to ps and pdf format and view
them with appropriate viewers.
- Modify makefile so that you can use make
view etc to compile and view essential.tex.
- Read essential.ps for a more detailed description
of latex basics.
Type
lyx
to start lyx. If this is the first time you run lyx, lyx
will try to detect the latex settings and generate a .lyx
directory under your home directory. This is where you put your personal
settings. It is highly recommended that you use helpdesk bind file.
It contains a lot of keyboard shortcuts for rapid input almost
all important math symbols. To use helpdesk bind file, copy the provided
bind file to ~/.lyx/bind
cp ~/lyxdemo/personal.bind ~/.lyx/bind/
To activate this bind file, you will need to set Edit -> Preference
-> interface -> bind file -> Browse -> User bind -> personal.bind
and then restart lyx. Press C-g b (press Control
and g keys, release both keys and then press b),
if you can see  , the bind file is loaded correctly. Before
you get used to all the shortcuts, it is a good idea to keep a copy
of shortcut reference with you. (reference.ps)
, the bind file is loaded correctly. Before
you get used to all the shortcuts, it is a good idea to keep a copy
of shortcut reference with you. (reference.ps)
Practice: Start and reconfigure lyx. Load helpdesk
bind file. Print reference.ps and have a look at the key
bindings.
Play with the menus for a while, guess what they mean. Then
- start a new lyx file.
- go to Layout -> Document. Choose article (AMS) as
your document class since we will be using ams math package. Note
that if you use the standard article class and insert
-> math -> case environment or other AMS only environments, you will
get compile errors. This is among the `easiest ways to get compile
errors of lyx'. If this happens, you can either
- change your document class to ams ones or,
- Layout -> Document -> Packages -> Use AMS Math, or
- put
-
- \usepackage{amsmath}
in the preamble. (layout -> Document -> preamble.)
- The leftmost drop list on the toolbar is the environment list
(roughly the same as latex environments). Enter title, author, chapter,
subchapter etc of the sample file and choose the right environment
for them. Note that Chapter* is the non-numbered version
of Chapter environment.
Save your file. Learn to
- Use View -> DVI to view dvi output, View -> PostScript
to view ps output. Lyx actually export the lyx file to latex and call
latex, xdvi, postscript etc to do these. If you are interested
in the underlying latex source, File -> Export ->
Latex and read the generated latex file.
- Modify your document and then View -> update -> DVI, View
-> Update -> PostScript (you will need to reload the ps file from
gv) to see updated output.
- Learn shortcuts F9, F10, F11, F12.
Practice: Enter the first several paragraphs of
the sample document.
Hint:
- F4, F5, F6 corresponds to normal,
bold, emphasis fonts. (only for helpdesk bind file)
- Use C-M to enter math mode. Use arrow
or blank keys to get out.
There are three ways to enter math mode: (fast to slow)
- Ctrl-M (Ctrl-M means press the Ctrl and
M keys at the same time. In reference.tex, C
stands for Control, S stands for shift
and M stands for meta (right Alt key for
windows keyboard)), or
- click the
 icon on the toolbar, or
- insert -> math -> inline formula
To enter math symbols, you can either (slow to fast)
- Use Math Panel (right click an existing formula or insert
-> math -> math panel ...), or
- In math mode, enter \ plus symbol name, e.g.
enter \alpha for
 , \propto
for
, \propto
for  . For symbol names, see latexsymbol.ps. or
- Use shortcuts (see shortcut reference). For example, C-g a
for , C-g r for
 , C-s 1 for
 ,
C-s i for
,
C-s i for  . Basically, C-g means Greek
character and C-s means symbol.
. Basically, C-g means Greek
character and C-s means symbol.
Character Accent:
- Use math panel or
- Use shortcuts C-_,~,^
etc , e.g., C-^ C-g a inputs
 .
For wide accent (e.g.
.
For wide accent (e.g.
 ) , use Meta-_,~,^
instead.
) , use Meta-_,~,^
instead.
Delimiters:
The sizes of ( ) may be small for math equations. The following
delimiters are paired (so they are easier to input) and can change
their sizes according to their context.
- Use math panel or
- Use Ctrl + ( ) [ ] { } | etc to input paired delimeters.
Shortcuts for one side delimeters are also available.
Other important shortcuts:
- C-UpArrow superscript, C-DownArrow subscript, I
prefer C-h/C-l though.
- C-/ fraction, C-s b binomial, C-s r root
- C-s s stack
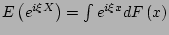
Practice: Input formula:
.
Hint:
\sqrt or
C-r
for

,
C-( for

,
\sigma
or C-s s for

,
C-_ X for

,
\mu or
C-g m for

,
C-s
s for stack,
C-s 1 or
Alt-RightArrow for
.
All previous plus:
- C-d for displayed formula. (helpdesk bindfile only)
- C-d in inline/display formula will toggle between them.
- If you prefer AMS align environments, insert -> math -> AMS
align environment etc
- In displayed formula, use C-enter to enter equarray
environment. It is important to know that the middle cells are used
for alignment purpose so only characters like =, >, <
etc are welcome. To add more lines, use C-Enter at the end
of a line.
- Insert -> label to name a formula, then use insert
-> cross reference to refer to it. Use C-n, C-N
to toggle numbering.
Important Usuage hints:
- In math mode, use C-M to enter text mode. (If you know latex,
it is $ \text{ } $.) Then, you can
not use C-M again to enter math mode within the text mode. Use right-arrow
to step out of the text mode. You will get compile
error if you input math symbols in text mode.
- C-s c for 2 cases, C-s C for 3 cases. (need ams
package and helpdesk bindfile)
- C-s m for 2 by 2 matrix, C-s M for 3 by 3 matrix,
C-s C-m a b for a by b matrix.
- use Edit -> math to add/delete row, column of a matrix or
change alignment.
- Sometimes, you will need one side delimiter, use math panel or shortcuts.
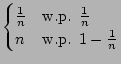
Practice: Input formula:
Hint: '=' should be in the middle cell of the equarray. You
can use either insert -> math -> case environment or one
side dilimiter { (C-s {) and then a 2 by 2 matrix.
Use C-M to toggle between text/math mode ( for text w.p.)
and edit -> math to change alignment, if necessary.
It is time to mention two ways of organizing tables and figures. The
first one is fixed. The tables or figures will be put where you insert
them. If there is not enough room in the current page, it will be
put to the next page but the rest of the current page will be left
blank. Floating tables and figures are designed to overcome this problem.
They will be put automatically according to a complex machanism to
achieve best layout.
To insert fixed table/figure:
insert -> tabular material insert -> Graphics
To insert floating table/figure:
insert -> floats -> table/figure,
then insert -> table/graphics within the floating box.
To set the floating preferences, right click the red 'float' box.
Usually, you need to set size and rotate propertiies.
In plain latex, it is rather difficult to use a spell checker. Now,
you can use edit -> spellchecker.
The concept of 'depth' of an environment is important. Two very import
shortcuts to remember are C-Left/RightArrow, or equivalently
Layout -> Change environment depth. To make depth adjustment
easier,
- There are many differnt 'enter's. Alt-Enter will keep environment
type and depth. Ctrl-enter will break line but do not break
paragraph, enter will break paragraph and go to depth 1.
- standard is also an environment (different from plain latex) . For
example, you want to insert a centered table within a enumerate environment,
start a paragraph, select as standard environment, use C-RightArrow
to make it one depth higher than the enumerate environment
and then choose layout -> paragraph -> center.
- If you use environment change a lot, it is time to learn shortcuts
C-p T (title), C-p s (standard), C-p 2,
3,4, (section, subsection etc).
- If you know latex pretty well and know how to do something quicker
in plain latex, do so. Click the red
 botton on the toolbar,
enter appropriate latex comand. The text will be in red so it is called
Evil Red Text (ERT). E.g. you can use ERT $x^2$
to input
botton on the toolbar,
enter appropriate latex comand. The text will be in red so it is called
Evil Red Text (ERT). E.g. you can use ERT $x^2$
to input  . One popular ERT is
\vspace{1in}
- If you have a big trunk of plain latex code, you can include them
directly in your lyx file through ERT. Anyway, if you have a full
latex file, importing it into lyx would be better.
- If you need to set preamble (read latexinto.pdf to see what
preamble is), use Layout -> Preamble. Useful preambles include
\usepackage{amsmath}
\numberwithin{thm}{section}
the first one include amsmath package (in case that you do not use
ams class.) The second one control how the equations will be numbered.
If you would like to include your source code into lyx, you can
- insert -> float -> algorithm
- set caption
- copy the source code from emacs etc
- select lyx Code environment
- Edit -> paste extenal selection -> as lines.
I would suggest the following way of dealing with bibliographic item.
- Keep your bibs in a separate bibtex file. (see sample.bib
file)
- use tkbibtex to edit the bib files. Try to keep track of
all articles you have read in this way. (Jabref may be easier to use
under windows).
- In lyx, insert -> Lists & TOC -> Bibtex reference at the
end of the document. Enter the path to your bib file, do not change
the style (default as plain) if you do not know other styles.
If you do, plainnat, natbib (layout -> document -> bibliographics
-> use natlib) will be helpful.
- Insert -> citation reference, use arrow in the dialog to
insert citation.
Lyx (actually latex) will take care of everything else for you. Note
that you can use ERT \nocite{*} to insert
bib items into your document without actually cite them.
Practice: Using sample.bib, insert a citation
into your lyx file.
File -> Export -> Latex will export your lyx file to .tex
file. File -> import -> Latex can import most of the 'clean'
latex files. However, because of the complexity of latex, lyx can
not load very complicated latex files, especially when they use non-standard
document style, lots of macros etc. It is advised that you use lyx
from the beginning rather than import a half-done latex file. If lyx
fails to import your tex file, try to hand-clean it before you import
it to lyx.
Practice: Export your lyx file to latex
and have a look at it. Then import it into lyx again.
Lyx uses a key-binding file to determine the key-bindings at start
time. You can choose from Emacs, SWP, CUA style by specifying the
appropriate file at:
Edit -> Preferences -> Look and Feel -> Interface -> Bind
File
You can add your own key bindings by
- copying a system binding file to ~/.lyx/bind
- Modify it.
- Set this bind file in preference dialog
The syntax of bind file is pretty easy, here is a few example:
\bind "C-f" "math-insert
\frac"
\bind "F5" "font-bold"
The first line binds Ctrl-f to \frac
(fraction). The second one maps F5 to font-bold
as SWP does. For more examples, have a look at the system bind files
at /usr/site/lyx/share/lyx/bind or my personal bind file.
Practice: Open ~/.lyx/bind/personal.bind,
insert a keybinding that bind C-s h to \aleph (

).
Save personal.bind, restart lyx, try to insert
.
You can use insert -> URL to insert a URL. However, if
you export -> html (or view html), there will be no html
style link. This is not lyx's fault since there is no standard way
of dealing link in latex. I, however, figure out a patch to do this.
- Save your lyx file, say article.lyx
- /home/helpdesk/bin/lyx2tex article.lyx
- latex2html article.tex
Basically, I modify the lyx file a little bit to let it create 'latex2html'
style link so that latex2html can recognize and create real links.
It would be convenient to use the provided make file.
Lyx is not perfect. It has many problems that may irritate even experienced
users, and you will sooner or later meet some. Fortunately, lyx is
becoming better and better and its user mailing list is very friendly.
(I am in that list, you can always send me questions and if I can
not answer them, I will post them to the list.) Certain precautions
should be made
- Compile (press F11) frequently, if any error occurs (latex compile
error), you know you made the mistake in recently input texts.
- If the problem persists, export to latex and try to see what forbid
latex from compiling. This is where latex knowledge becomes very useful.
Anyway, if you can avoid the following two common problems, you can
use lyx for a long time without having to face compile error:
- use AMS package when you input AMS-specific environments like cases,
align etc.
- do not enter math symbol in text mode. (Use right-arrow to step out
of text mode instead of using nested math mode.)
- Latex output is in general beautiful. However, you will run into trouble
if you want to do fancy things like putting a logo on every page etc.
(It is doable but needs the right, if not lots of, latex code.) You
can find a lot of such tricks from lyx webpage.
- You might need to use some other style (class) file. For example,
you will need to write your thesis with some provided class file.
It is possible to incorporate outside layout file into lyx but it
would be simpler to export your lyx file to latex and modify it (especially
when your advisor does not use lyx.)
Since lyx depends on various Unix tools and the X-windows system,
you will have to provide all of them on your windows machine before
lyx can be installed. That is to say, you will have windows version
of latex (teTEX), of Unix (Cygwin), of X (X-win32 or Xfree86),
of ghostview etc. Detailed instructions can be googled through ``lyx
windows''. There is recently a native lyx port that may be easier
to install.
A Simple Guide to Latex/Lyx
This document was generated using the
LaTeX2HTML translator Version 2002-1 (1.68)
Copyright © 1993, 1994, 1995, 1996,
Nikos Drakos,
Computer Based Learning Unit, University of Leeds.
Copyright © 1997, 1998, 1999,
Ross Moore,
Mathematics Department, Macquarie University, Sydney.
The command line arguments were:
latex2html -local_icons -no_subdir -split 0 lyxguide.tex
The translation was initiated by Statistics Helpdesk on 2005-03-04
Statistics Helpdesk
2005-03-04